|
|
|
|
 Navigation
  Newsletter
  Advertising


 Link me
 Site stats
 I'll teach you how to get your own bot for Battle.net. It actually can connect on the following games :
You need a CD-Key for one of this game if you want to be able to use StealthBot.
The first step is really easy! Click on the following hyperlink to get StealthBot :
Once you got the file, install it normally : "Next" -> "Next" -> "I Agree" -> "Next" -> Choose a folder -> "Next" -> "Next" -> "Close"
You now have StealthBot installed on your computer but it's just the beginning...
 |
If you had an old build of Stealthbot 2.7 on your computer, you'll have to uninstall this version before to install the new one. To do this, run this install version and choose "Next" -> "Remove Stealthbot" -> "Finish" -> "Close". Don't worry, it won't remove your settings. Then you can install it normally. |
Good job, the installation is now done!
Now run StealthBot Launcher on your desktop. You should see this window :
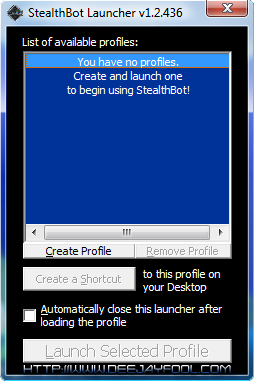
Click on "Create Profile" and write the name of a profile in the window below (it's not the account of the bot, it's only a name for the configuration) :
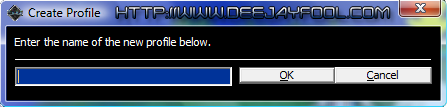
Once you wrote the name, press "OK"
In the previous window, select the name that you just created and click on "Launch Selected Profile".
Click on "Settings/Bot Settings" or press Ctrl+P. Fill the textbox as explained below :
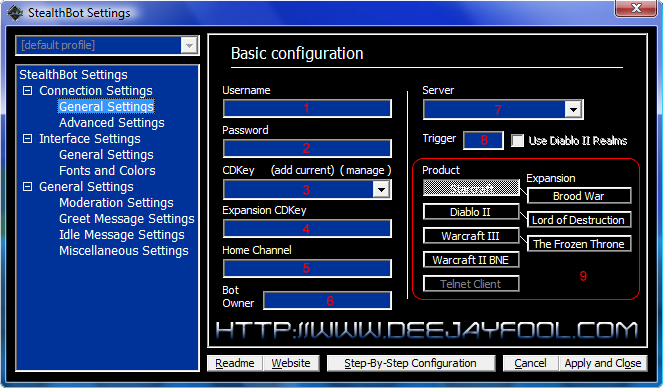
To finish, click on Apply and Close.
You can finally click on "Connect" and you'll be connected! Congratulation!
Tutorial made by Deejayfool
(October 11th, 2009 - Last edition : November 25th, 2009)


